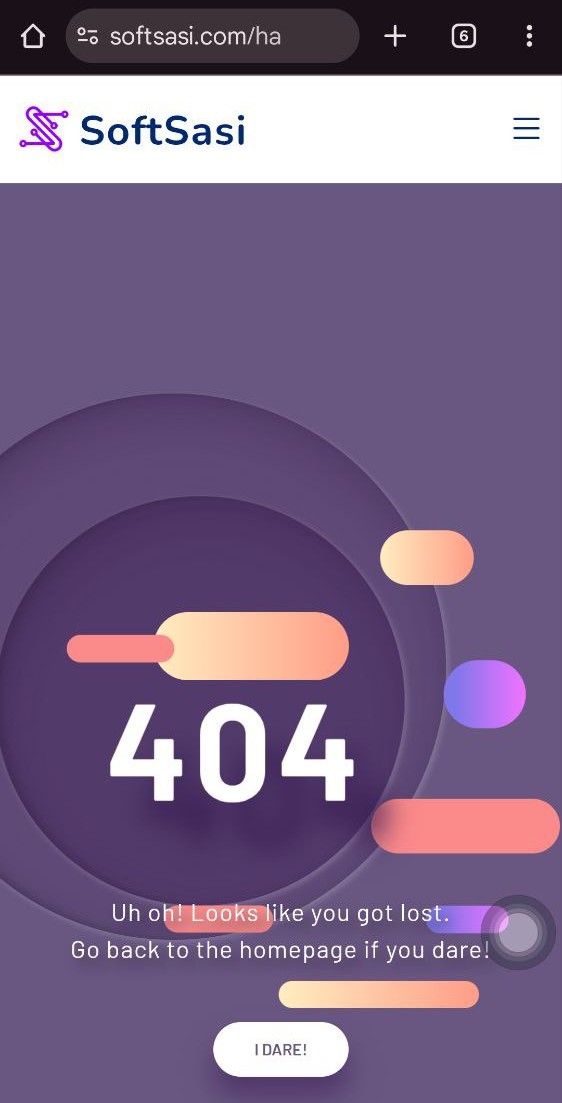
The "magnetic field interaction" you noticed is actually the Parallax effect responding to your phone's gyroscope. The system operates through intentional design which creates user interface elements that maintain spatial distance from each other. The background and foreground elements create a 3D illusion which moves at different speeds according to mouse movement tracking on desktops and device tilt detection on mobile devices, which creates a 3D illusion that captivates visitors.
How the Parallax effect works
-
Gyroscope & Mouse Tracking: The library listens for input events-tilting a mobile device or moving a cursor on a desktop.
-
Layered Depth: It assigns different movement speeds to different elements based on a "depth" value.
-
Visual Immersion: This creates a dynamic scene where elements float relative to the user's perspective.
Implementation workflow (Step by Step)
To replicate this effect on your own homepage or hero section, you need to implement three core components: the library, the HTML structure, and the initialization script.
-
The Library
-
Include the Parallax.js script at the bottom of your page to power the effect.
-
Script source:
<script src="https://cdnjs.cloudflare.com/ajax/libs/parallax/3.1.0/parallax.min.js"></script>
-
-
The HTML Structure
-
Wrap your content in a main container (the scene).
-
Assign a
data-depthattribute to child elements. Higher numbers (1.0) move faster (close up), while lower numbers (0.2) move slower (background). -
Example structure:
<div id="hero-scene">

  <h1 data-depth="0.6">I Move!</h1>

  <img src="shape.png" data-depth="0.2">

</div>
-
-
The Initialization
-
Add a small JavaScript snippet to target your scene and start the engine.
-
Code:
var scene = document.getElementById('hero-scene');

var parallax = new Parallax(scene);
-
Why use Parallax on your site?
The implementation of a parallax effect enables websites to deliver more engaging interactive content. Users spend more time on the website because they receive visual feedback about their physical movements. The technique demonstrates optimal results when applied to Hero sections and landing pages and creative portfolios which need to establish a powerful initial impact.
Essential configuration tips
- Depth Calibration
>Keep background elements at low depth (0.1 - 0.3) to prevent motion sickness. >Use higher depth (0.6 - 1.0) sparingly for key focal points. >Ensure the scene container has a relative or absolute position to contain the moving parts.
-
Performance check
-
Test on mobile devices to ensure the gyroscope permissions are handled correctly.
-
Verify that large images are optimized so the movement remains smooth without lag.
-